The Anderson teaching labs and Olin 210 conference rooms allow for wired or wireless device connection to the Crestron presentation system. You will need to turn on the projection system via the touch panel or button controller located on the wall.
General Room Information
In-lab Computers Available
The PHAS Advanced Teaching Labs Anderson 027 and 035 have both iMacs and PC desktops available for use.
The PHAS Intro Teaching Labs Anderson 021 and 025 only have iMacs available for use.
Projector Controller Types
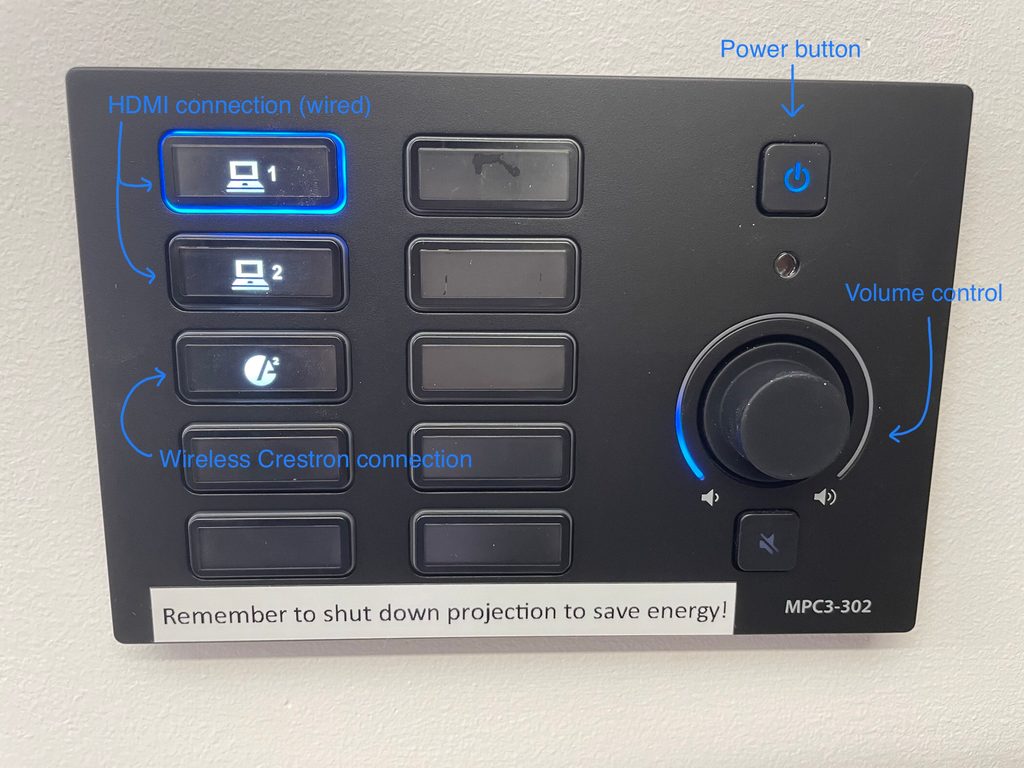
Button control system
AND 035, AND 027, AND 024, and Olin 210 conference rooms have the button controller.
Note: The volume control on the AND 027 control panel is currently broken. AND 027, AND 024, and Olin 210c are missing their HDMI cable with adapter ring.
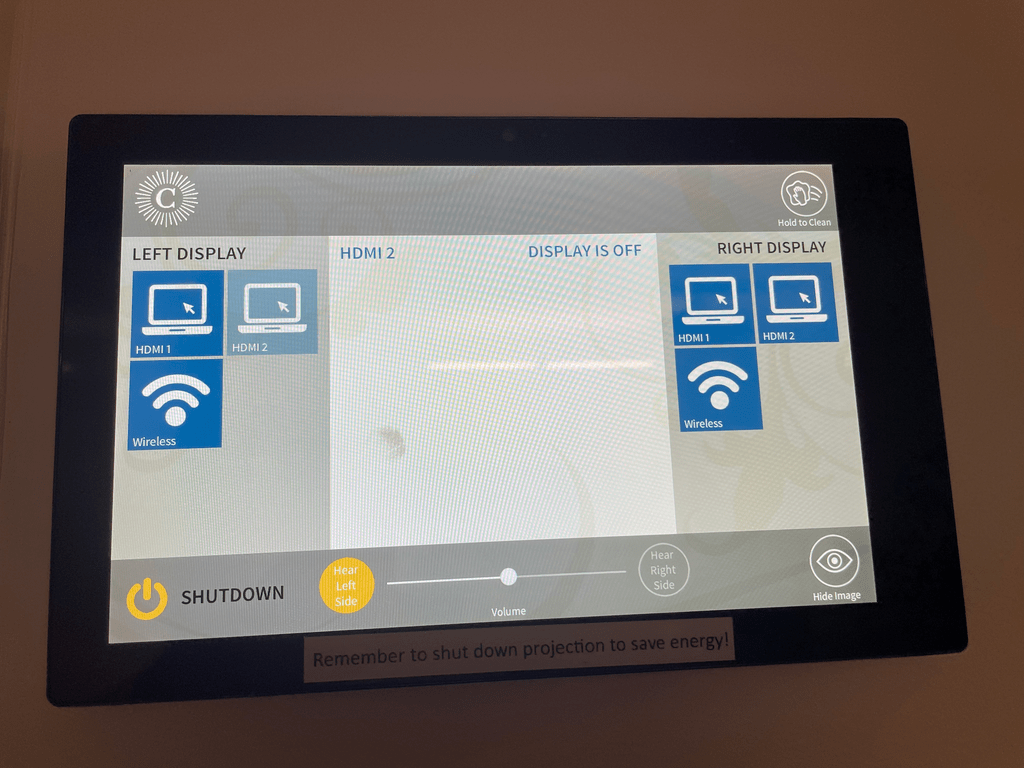
Touch panel control system
AND 025 and AND 021 have the touch panel control system. This touch control panel system controls two separate projector units that allow you to display two different screens simultaneously. Either:
- Connect your two devices via a wired connection to the two available HDMI ports and click the appropriate settings for display.
- Connect one device via a wired connection to one of the two available HDMI ports and connect the other device wirelessly. Click the appropriate settings for display.
Note: You will not be able to wirelessly connect two devices for separate displays.
Turning on/ off the projection system
Via the button controller:
- Turning on: hold the power button until the buttons on the control panel turn blue.
- Turning off: hold the power button until the buttons on the control panel dim.
Via the touch panel:
- Turning on: tap the control panel and once the control panel illuminates, press your projection system of choice.
- Turning off: tap the shutdown button in the lower left-hand corner of the screen. If both the right and left projection system are on, you will be given the choice to turn only one or both off. If only one projection system is on, you will be given the choice to turn the entire system off.
HDMI (wired) connection
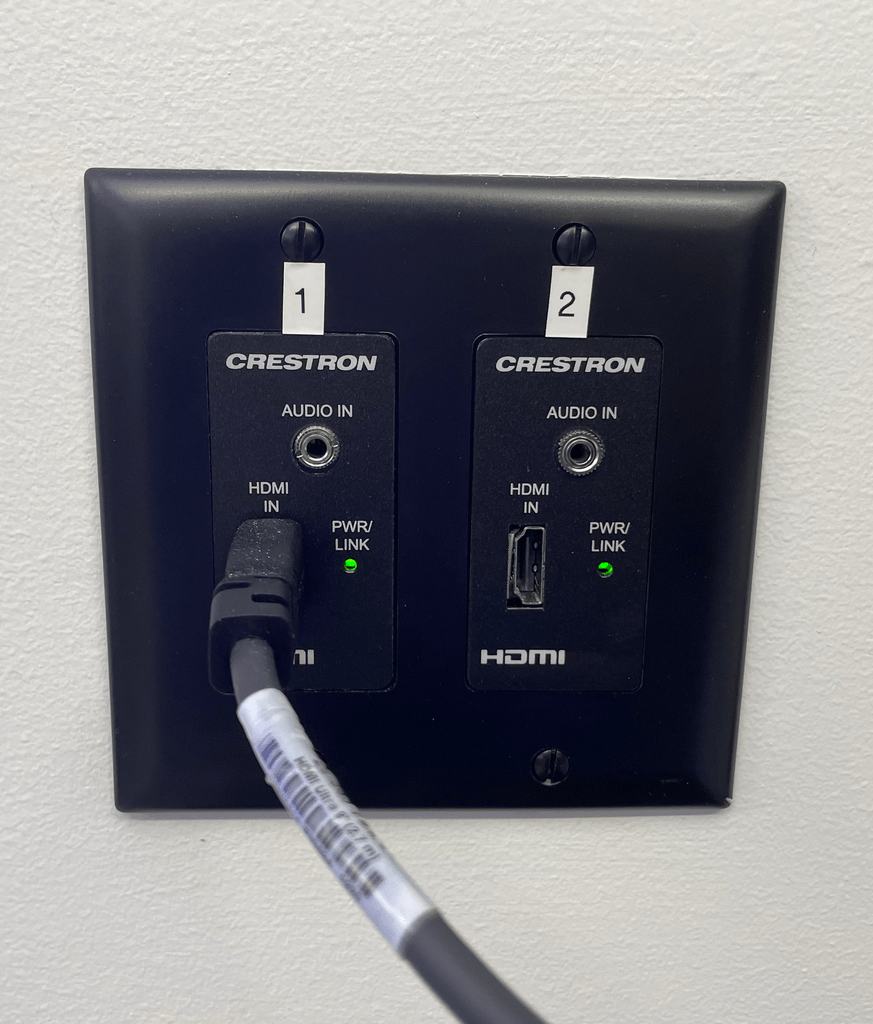
Using the provided HDMI cable and the appropriate adapter, plug your device into the HDMI wall port.
Anderson lab rooms: the HDMI wall port is located near the control panel.
Olin 210 conference rooms: the HDMI wall port is located on the wall below the monitor.
Depending on the HDMI wall port used, click the appropriate button on the control panel. (i.e. if the HDMI cable is plugged into HDMI 1, click HDMI 1 on the control panel.)
Sound control:
Windows/ Android: Volume can be controlled through device sound controls (laptop/phone) or the control panel on the wall.
macOS/ iOS: Volume can only be controlled by the control panel on the wall.
- Note for macOS: You may need to change the sound settings on your device so that the sound can come from the in-room speakers. Choose “Extron HDMI” as your output device.
Crestron Air Media (wireless) connection
NOTE: The term ‘Wireless” is misleading. The PHASLab Macs and PCs talk to PHASLab projection systems via their wired Ethernet connection instead of using a WiFi connection. However personal devices can use a WiFi connection.
Install the Crestron AirMedia app if necessary
All PHASLab computers have the Crestron Air Media App installed.
If you are using a personal device, follow Carleton ITS’ “Quick Start Guide” for app download and connection instructions. (Note for Windows PCs: When installing the Crestron Air Media App, you will need to approve LAN (work network) firewall exception.)
Turn on the Projection system and tell it to listen for wireless input
In rooms AND 027 and AND 035 with the button based Projection System Controller, press the power
button and then press the button with the “Circle A” symbol.
In rooms AND 021 and O25 with the touchscreen based Projection System Controller, touch the
touch panel to wake it up and then press one or both of the Wireless icons depending on which projectors you wish to use.
Launch the Crestron AirMedia app
- macOS: The Crestron Air Media App will be located in the dock at the bottom of the home screen.
- You can also locate the Crestron Air Media App by pressing “command” + space bar and typing in “Crestron Air Media.”
- Windows: The Crestron Air Media App can be located by pressing the windows button, then typing in “Crestron Air Media.”
As soon as you launch it, the Crestron AirMedia App should notify you that it’s looking for local connections. It will fail. That’s OK. However, if the app doesn’t try to look for local connections, and doesn’t show any buttons after launch, the only remedy (that we’re aware of) is to reboot the computer and try again.
Connect to the projector (Windows)
In the Crestron AirMedia app, enter IP address the projector displays in the lower left hand corner (to the right of the ‘Visit’ label (e.g. ‘http://10.160.13.14’). Enter only the IP address – omit the leading ‘http://’.
In the Crestron AirMedia app, enter 4 digit code the projector displays in the lower left hand corner (to the right of the ‘Code’ label.
If the app cannot make a connection to the projector, select the ‘Previous connections’ button that looks like a clock. You should find the desired connection listed there. Select the ‘Connect’ button next to it. You will be prompted for the code again. This time you should succeed.
Shortcut: Note that usually a PC’s ‘Previous Connection’ list is pre-populated with the room’s projector, so a quick way to connect is to select the Previous Connection button first and then select the one entry listed on that page – then you don’t need to enter the projector’s IP, just the 4 digit code.
Your PC’s screen should now mirrored in the Projectors image.
Connect to the Projector(s) (macOS)
In the Crestron AirMedia app, enter IP address the projector displays in the lower left hand corner (to the right of the ‘Visit’ label (e.g. ‘http://10.160.13.14’). Enter only the IP address, and omit the leading ‘http://’.
In the Crestron AirMedia app, enter 4 digit code the projector displays in the lower left hand corner (to the right of the ‘Code’ label.
The Crestron AirMedia app will show an error message at the bottom of the window (“Unable to verify certificate”). Ignore this.
Select the macOS ‘Control Panel’ menu item located in the upper right of the screen. It’s located just to the left of the date display and looks like two capsules lying on their side stacked on top of each other.
When the Control Panel pops up, select ‘Screen Mirroring’
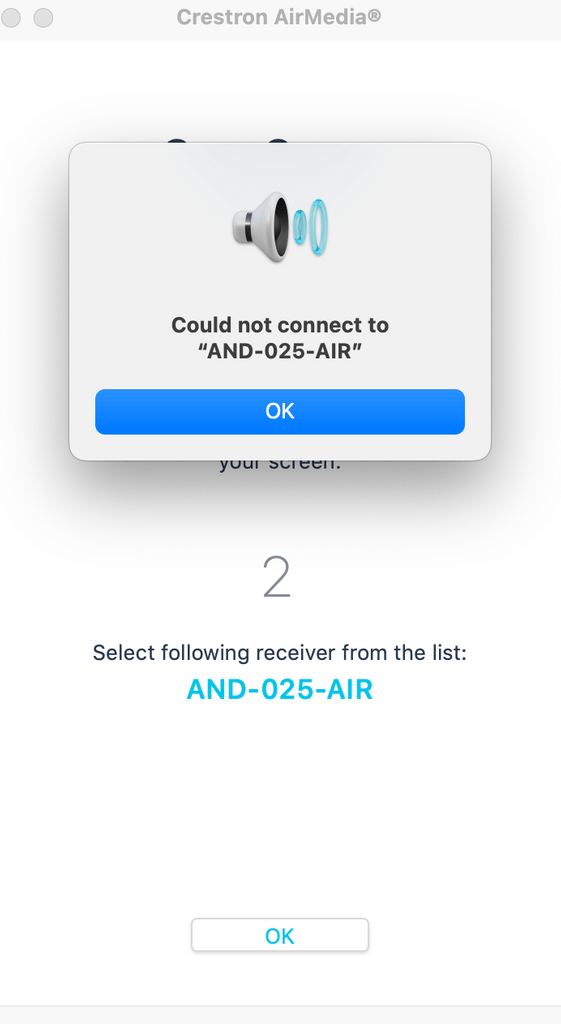
In the Screen Mirroring window that pops up, select ‘AND-<ROOM>-AIR’ (e.g ‘AND-025-AIR’ for Anderson 025).
You will be prompted for the code again.
After entering the code, both your iMac screen and the projector(s) should go dark for a second and then you should see your iMac screen be mirrored by the projector(s).
Shortcut: Note that usually a Mac’s ‘Previous Connection’ list is pre-populated with the room’s projector, so a quick way to connect is to select the Previous Connection button first and then select the one entry listed on that page – then you don’t need to enter the projector’s IP, just the 4 digit code.
General notes/ troubleshooting:
- You can adjust your projected display settings in macOS between “extended screen” and “mirrored screen” in the airplay settings. (“Control Center” > “Screen Mirroring” > “Extended Screen” or “Mirrored Screen”)
- If the airplay setting does not appear in your menu bar, click on the “Screen Mirroring” button in the “Control Center” and click on the airplay name again to disconnect.
For personal macOS devices: Depending on the software being run, you may experience more connectivity issues.
- To maximize connectivity success, update your macOS and the Crestron Air Media app to the latest versions.
- A connection error stating, “Could not connect to [airplay name],” may still occur. If this happens, use one of the in-lab computers or connect through the HDMI cable.
Sound control:
Windows/ Android: Volume can be changed through the controls within the Crestron Air Media App or by the control panel on the wall. If the sound is adjusted using device sound controls (laptop/phone), the audio will disconnect from the in-room speakers and be projected from the computer speakers.
macOS/ iOS: Volume can be controlled through device sound controls (laptop/phone) or the control panel on the wall.
Disconnecting the computer from the Projection System (Windows)
Press the Crestron AirMedia app’s ‘Disconnect’ button.
Disconnecting the computer from the Projection System (macOS)
Select the ‘Screen Mirroring’ menu item located in the upper right of the screen. It looks like two superimposed rectangles.
In the Screen Mirroring window that pops up, select ‘AND-<ROOMNUMBER>-AIR’ (e.g. ‘AND-025-AIR’).
Turn off the Projection System
Please turn off the projection system from the touchscreen when you’ve finished! This saves power and preserves the projector(s).
Olin 210 conference rooms: Epson smart projector pen
The projector systems in Olin 210a and Olin 210c have additional functionality through the Epson smart projector, allowing you to annotate the projected screen with the Epson projector pen. Each room has 2 projector pens.
To use:
- After turning on the projector system, locate an Epson projector pen and press the black button on the pen.
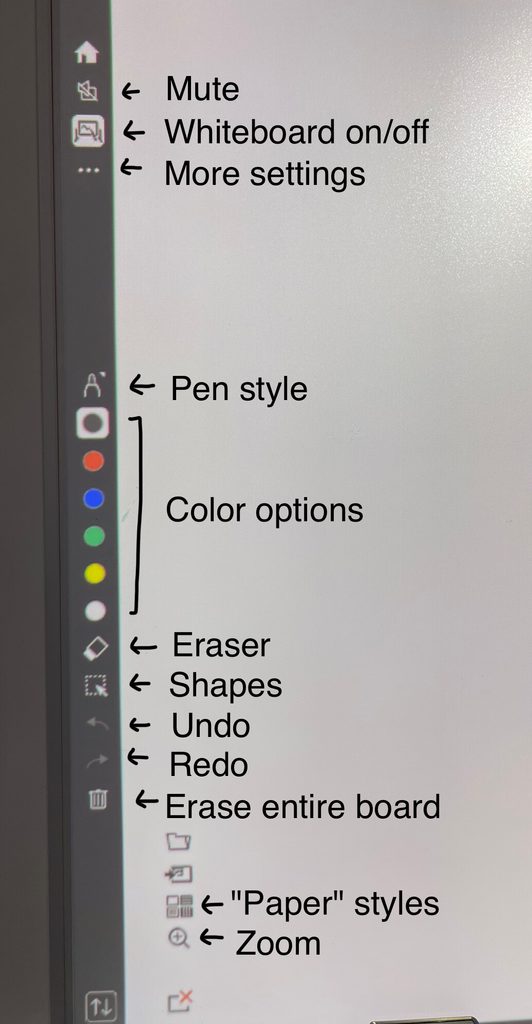
- On the projected screen, a toolbar will be located on one of the edges of the screen. Using the pen, click your desired settings.
- Use the pen as you would a normal whiteboard marker.
You can set the smart projector to use as a normal whiteboard by clicking on the appropriate settings or project your personal device for annotation.