Anderson 121
Please use the classroom computer for Zoom and Panopto as it is connected to the installed cameras.
The two cameras in the room are controlled through the touchscreen, giving additional options for capturing. The 4 microphones installed in the ceiling are configured to capture instructor and student voices. Use the touchscreen to choose whether faculty are on camera (Instructor Cam = camera in back of room) or students are on camera (Student Cam = camera in front of room)
To get started, on touchscreen, select Camera, select what camera you want.
Other Options:
- Back Light – provides a little more light
- Zoom In and Out – adjusts Zoom of camera
- Pan/Tilt options allow for camera movement
- Instructor Cam Preset 1 – focus on instructor positioned behind lectern
- Instructor Cam Preset 2 – focus on white board directly underneath front camera
- Student Cam Preset 1 – focus on all student seats
Presets can be changed or added by holding a preset button for 3 seconds when desired camera position is achieved. We ask that you do not change Preset 1 and 2 for Instructor Cam.
BOL 104
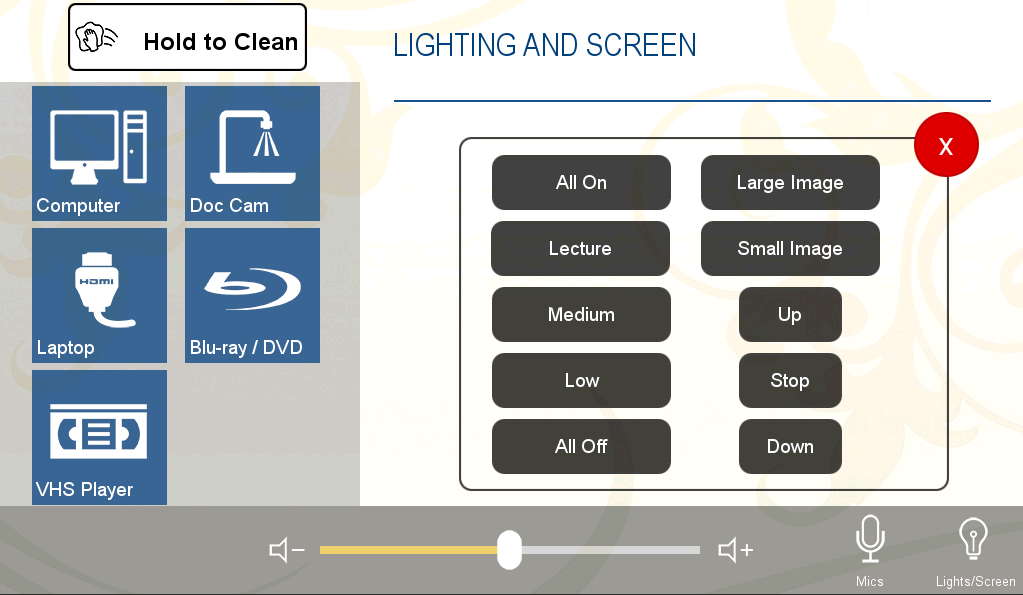
Use “Lights/Screen” in the lower right-hand corner of the touch panel to access additional controls.
CMC 306
Please use the classroom computer for Zoom and Panopto as it is connected to the installed cameras.
Zoom Video and Audio Settings: The default settings for the microphone are set for the EasyIP Mixer. If you have trouble with the microphones, please check this setting (in Zoom, bottom left corner, arrow next to the microphone.). For speakers, the default is ExtronScaler D, for camera EasyIP Mixer.
Touchscreens: You will see two touchscreens, one that controls what is displayed (left of monitor) and one that controls the two cameras and four microphones (right of monitor)
The Home Screen provides options to control the two cameras. The four microphones in the ceiling are configured to capture instructor and student voices. Use the touchscreen to choose whether faculty are on camera (Instructor Cam = camera in back of room) or students are on camera (Student Cam = camera in front of room)
Other Options
- Pan/Tilt, includes Zoom options
- Instructor Cam Preset 1 – focus on instructor positioned behind lectern
- Instructor Cam Preset 2 – focus on center of board
- Student Cam Preset 1 – focus on almost all student seats
- Audio screen – keep settings as is to keep the balance of the 4 microphones.
- Macro screen – no functionality at this point.
- Remember to turn off projector on smaller touchscreen
Hasenstab 105
Please use your laptop for Zoom and Panopto. A USB cable for the connection is labeled as CAM/MIC.
Zoom Video and Audio Settings: The default settings for the microphone are set for the EasyIP Mixer. If you have trouble with the microphones, please check this setting (in Zoom, bottom left corner, arrow next to the microphone.). For speakers, the default is Crestron, for camera EasyIP Mixer.
Touchscreens: The two cameras in the room are controlled through the touchscreen, giving additional options for capturing. The 4 microphones installed in the ceiling are configured to capture instructor and student voices. Use the touchscreen to choose whether faculty are on camera (Instructor Cam = camera in back of room) or students are on camera (Student Cam = camera in front of room)
Other Options:
- Back Light = provides a little more light
- Zoom In and Out – adjusts Zoom of camera
- Pan/Tilt options allow for camera movement
- Instructor Cam Preset 1 – focus on instructor positioned behind lectern
- Instructor Cam Preset 2 – focus on board directly underneath front camera
- Student Cam Preset 1 – focus on all student seats
Presets can be changed or added by holding a preset button for 3 seconds when desired camera position is achieved. We ask that you do not change Preset 1 and 2 for instructor cam
Note: please consider how your choice may affect remote students.
You may need to adjust sound settings in Zoom to hear remote participants through speakers.
Laird 205
Please use your laptop for Zoom and Panopto. A USB cable for the connection is labeled as CAM/MIC.
Zoom Video and Audio Settings: The default settings for the microphone are set for the EasyIP Mixer. If you have trouble with the microphones, please check this setting (in Zoom, bottom left corner, arrow next to the microphone.). For speakers, the default is Crestron, for camera EasyIP Mixer.
Touchscreens: The two cameras in the room are controlled through the touchscreen, giving additional options for capturing. The 4 microphones installed in the ceiling are configured to capture instructor and student voices. Use the touchscreen to choose whether faculty are on camera (Instructor Cam = camera in back of room) or students are on camera (Student Cam = camera in front of room)
Other Options:
- Back Light = provides a little more light
- Zoom In and Out – adjusts Zoom of camera
- Pan/Tilt options allow for camera movement
- Instructor Cam Preset 1 – focus on instructor positioned behind lectern
- Instructor Cam Preset 2 – focus on board directly underneath front camera
- Student Cam Preset 1 – focus on all student seats
Presets can be changed or added by holding a preset button for 3 seconds when desired camera position is achieved. We ask that you do not change Preset 1 and 2 for instructor cam
Note: please consider how your choice may affect remote students.
You may need to adjust sound settings in Zoom to hear remote participants through speakers.
LDC 335
Please use the classroom computer for Zoom and Panopto as it is connected to the installed cameras.
The two cameras in the room are controlled through the touchscreen, giving additional options for capturing. The 4 microphones installed in the ceiling are configured to capture instructor and student voices. Use the touchscreen to choose whether faculty are on camera (Instructor Cam = camera in back of room) or students are on camera (Student Cam = camera in front of room)
To get started, on touchscreen, select Camera, select what camera you want.
Other Options:
- Back Light – provides a little more light
- Zoom In and Out – adjusts Zoom of camera
- Pan/Tilt options allow for camera movement
- Instructor Cam Preset 1 – focus on instructor positioned behind lectern
- Instructor Cam Preset 2 – focus on white board directly underneath front camera
- Student Cam Preset 1 – focus on all student seats
Presets can be changed or added by holding a preset button for 3 seconds when desired camera position is achieved. We ask that you do not change Preset 1 and 2 for Instructor Cam.
Leighton 236
Please use the classroom computer for Zoom and Panopto as it is connected to the installed camera.
Dual projection: This room allows for some flexibility in displaying information – both projectors show the same image, one projector shows the computer, the other a laptop, connected via HDMI; or one projector shows the computer while the other is off, with a raised screen, to allow for use of the chalkboard.
Note: please consider how your choice may affect remote students.
Sound: Decide which source/screen you want to use (right or left side of room). You may need to adjust sound settings in Zoom to hear remote participants through speakers.
Leighton 304
Please use the classroom computer for Zoom and Panopto as it is connected to the installed camera.
The two cameras in the room are controlled through the touchscreen, giving additional options for capturing. The 4 microphones installed in the ceiling are configured to capture instructor and student voices. Use the touchscreen to choose whether faculty are on camera (Instructor Cam = camera in back of room) or students are on camera (Student Cam = camera in front of room)
To get started, on touchscreen, select Camera, select what camera you want.
Other Options:
- Back Light = provides a little more light
- Zoom In and Out – adjusts Zoom of camera
- Pan/Tilt options allow for camera movement
- Instructor Cam Preset 1 – focus on instructor positioned behind lectern
- Instructor Cam Preset 2 – focus on board directly underneath front camera
- Student Cam Preset 1 – focus on all student seats
Presets can be changed or added by holding a preset button for 3 seconds when desired camera position is achieved. We ask that you do not change Preset 1 and 2 for instructor cam
Dual projection: This room allows for some flexibility in displaying information – both projectors show the same image, one projector shows the computer, the other a laptop, connected via HDMI; or one projector shows the computer while the other is off, with a raised screen, to allow for use of the chalkboard.
Note: please consider how your choice may affect remote students.
Sound: Decide which source/screen you want to use (right or left side of room). You may need to adjust sound settings in Zoom to hear remote participants through speakers.
Leighton 305
Please use the classroom computer for Zoom and Panopto as it is connected to the installed camera.
Dual projection: This room allows for some flexibility in displaying information – both projectors show the same image, one projector shows the computer, the other a laptop, connected via HDMI; or one projector shows the computer while the other is off, with a raised screen, to allow for use of the chalkboard.
Note: please consider how your choice may affect remote students.
Sound: Decide which source/screen you want to use (right or left side of room). You may need to adjust sound settings in Zoom to hear remote participants through speakers.
Leighton 426
This room contains both a projector with screen and a front monitor, allowing for dual input. The back monitor also shows what is projected through the projector.
The two cameras in the room are controlled through the remote/touchscreen, giving additional options for capturing. Use the touchscreen to choose whether faculty are on camera (camera in back of room) or students are on camera (camera in front of room)
Use the classroom computer for Zoom or Panopto.
NOTE: as of Fall 2022, this room has only one camera to show faculty (camera in back of room).
Olin 102
Olin 102 is a conference room with calling features, a single PTZ camera (controllable by a remote located near the touch panel), and a computer in the corner rack.
Willis 204
Please use the classroom computer for Zoom and Panopto as it is connected to the installed cameras.
The two cameras in the room are controlled through the touchscreen, giving additional options for capturing. The 4 microphones installed in the ceiling are configured to capture instructor and student voices. Use the touchscreen to choose whether faculty are on camera (Instructor Cam = camera in back of room) or students are on camera (Student Cam = camera in front of room)
To get started, on touchscreen, select Camera, select what camera you want.
Other Options:
- Back Light – provides a little more light
- Zoom In and Out – adjusts Zoom of camera
- Pan/Tilt options allow for camera movement
- Instructor Cam Preset 1 – focus on instructor positioned behind lectern
- Instructor Cam Preset 2 – focus on white board directly underneath front camera
- Student Cam Preset 1 – focus on all student seats
Presets can be changed or added by holding a preset button for 3 seconds when desired camera position is achieved. We ask that you do not change Preset 1 and 2 for Instructor Cam.
Weitz 136
Please use the classroom computer for Zoom and Panopto as it is connected to the installed cameras.
Zoom Video and Audio Settings: The default settings for the microphone are set for the EasyIP Mixer. If you have trouble with the microphones, please check this setting (in Zoom, bottom left corner, arrow next to the microphone.). For speakers, the default is ExtronScaler D, for camera EasyIP Mixer.
Touchscreens: You will see two touchscreens, one that controls what is displayed (left of monitor) and one that controls the two cameras and four microphones (right of monitor)
The Home Screen provides options to control the two cameras. The four microphones in the ceiling are configured to capture instructor and student voices. Use the touchscreen to choose whether faculty are on camera (Instructor Cam = camera in back of room) or students are on camera (Student Cam = camera in front of room)
Other Options
- Pan/Tilt, includes Zoom options
- Instructor Cam Preset 1 – focus on instructor positioned behind lectern
- Instructor Cam Preset 2 – focus on center of board
- Student Cam Preset 1 – focus on almost all student seats
- Audio screen – keep settings as is to keep the balance of the 4 microphones.
- Macro screen – no functionality at this point.
- Remember to turn off projector on smaller touchscreen
WCC 161 (Cinema)
This auditorium seating room will have a challenge with voice amplification. The camera at the podium is connected to the classroom computer; please use this computer for Zoom and Panopto.
Students will sit at appropriate distances, making it potentially difficult for faculty to be heard by everyone.
The touchscreen offers multiple light options
The computer monitor is by default covered with a black cover to avoid glare.
Weitz 235
This room not only has a camera that is connected to the classroom computer for you to use with Zoom, but it has multiple projection options for you and your students. These choices may make it more challenging to bring remote students successfully into the classroom.
- Camera: the camera in the room is connected to the classroom computer; please use the classroom computer with Zoom and Panopto.
- Projection: To show the classroom computer on the 2 projection screens, simply select Computer on the touchscreen.
To show the classroom computer on the monitors around the room, select Student Displays on touchscreen (bottom right) – this gives you a new screen to select the computer or a different device to show on all monitors. - Student Device Display: Students in the room can connect to the individual monitor of the table they are at. On touchscreen at teacher station, select Student Display to allow students to share. They can choose to use the local computer (hiding in the table) or connect a laptop (via HDMI 1 or 2, labeled on cable). The little black box on each table manages the connection (Computer, HDMI1, HDMI2) – students select the appropriate button.
In addition to individual table display, another option at the teaching station is to select a particular monitor to be pushed to all monitors.
Note: if you have remote students, content sharing needs to happen via Zoom’s Screen Sharing capability. - Whiteboards: Students can use the whiteboards with their own dark markers but need to keep 6 feet distance. Use the whiteboard ahead of time to give prompts and have students work on them during a gallery walk, moving from one board to the next.
Note: this only works for students in classroom; for remote students, consider Google Jamboards or Padlet as a space for collaboration and virtual gallery walks.